Planting Tips, D-I-Y Projects and More
Blackberry Planting And Care
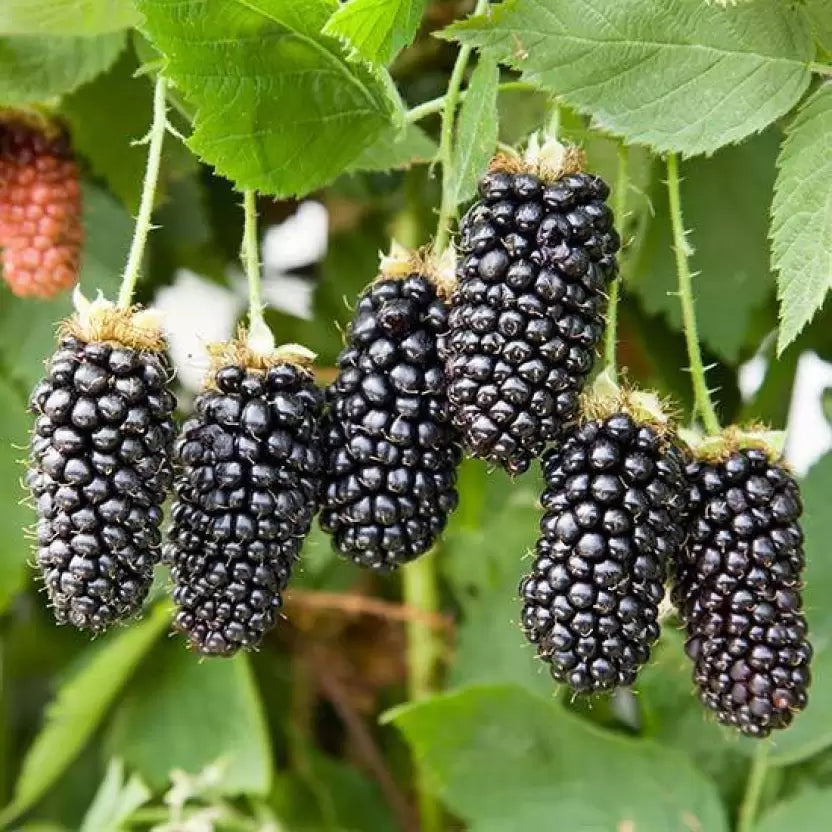
Blackberries are productive, flavorful, and surprisingly easy to grow. With proper planting and care, they will reward you with abundant harvests year after year. Use this guide to give your blackberry plants the best possible start.
1. Plant Description
Blackberries are deciduous shrubs in the Rubus genus. They feature:
- Thorny or thornless canes (thornless are easier to maintain)
- Compound leaves
- White to pale pink blossoms
- Clustered berries composed of multiple drupelets
2. Size & Height of Plant
- Average height: 3–6 feet
- Average spread: 2–3 feet
- Thornless varieties are popular for easy care and harvesting
3. Fruit Description & Time of Ripening
- Fruit color: dark purple to deep black
- Flavors: juicy, sweet-tart, aromatic
- Ripening window:
- Mid-summer to early fall for most varieties
- Early varieties: as early as June
- Late-season varieties: up to September
4. Bearing Age
- Begins fruiting in the second year
- Reaches full production by the third year
5. Site Selection
- Choose a site with full sun (6–8 hours daily) for best berry production.
- Ensure good air circulation to reduce disease pressure.
- Avoid poorly draining areas — blackberries dislike waterlogged roots.
6. Soil Requirements
- Preferred pH: 5.5–7.0 (slightly acidic to neutral)
- Requires well-drained soil
- Amend with organic matter such as compost for improved fertility
7. Pests & Diseases
Common Pests:- Aphids
- Spider mites
- Japanese beetles
- Rust
- Powdery mildew
- Cane blight
Tip: Regular inspection and early treatment with appropriate insecticides or fungicides help keep plants healthy.
8. Spacing
- Plant blackberries 3–4 feet apart within rows
- Space rows 6–8 feet apart for easy access and airflow
9. Planting Instructions
- Plant in late fall or early spring when soil is workable.
- Dig a hole deep enough for the roots.
- Plant at the same depth as it was in the nursery container.
- Water thoroughly after planting.
10. Watering
- Keep soil consistently moist during the growing season.
- Provide 1–2 inches of water per week.
- Mulch to retain moisture and suppress weeds.
11. Fertilizer (Organic or Inorganic)
- Apply a balanced fertilizer (10-10-10) during planting and again each early spring.
- Organic options include:
- Well-rotted compost
- Manure
12. Pollination
Most blackberry varieties are self-pollinating, but planting multiple varieties can improve yields.
13. Harvest & Storage
- Harvest when berries are fully colored and come off easily with a light tug.
- Use fresh or store in the refrigerator for up to one week.
- Freeze for long-term storage.
14. Care by Season
- Spring: Prune out dead or damaged canes and apply fertilizer.
- Summer: Water regularly and monitor for pests and diseases.
- Fall: Water until the ground freezes; mulch for winter protection.
15. USDA Hardiness Zones
Blackberries grow well in USDA Zones 5–10. Choose varieties adapted to your zone for best results.
Final Tip: With proper site selection, consistent watering, and seasonal maintenance, blackberry plants will produce abundant harvests year after year.
Planting Guide for Kiwi Plants
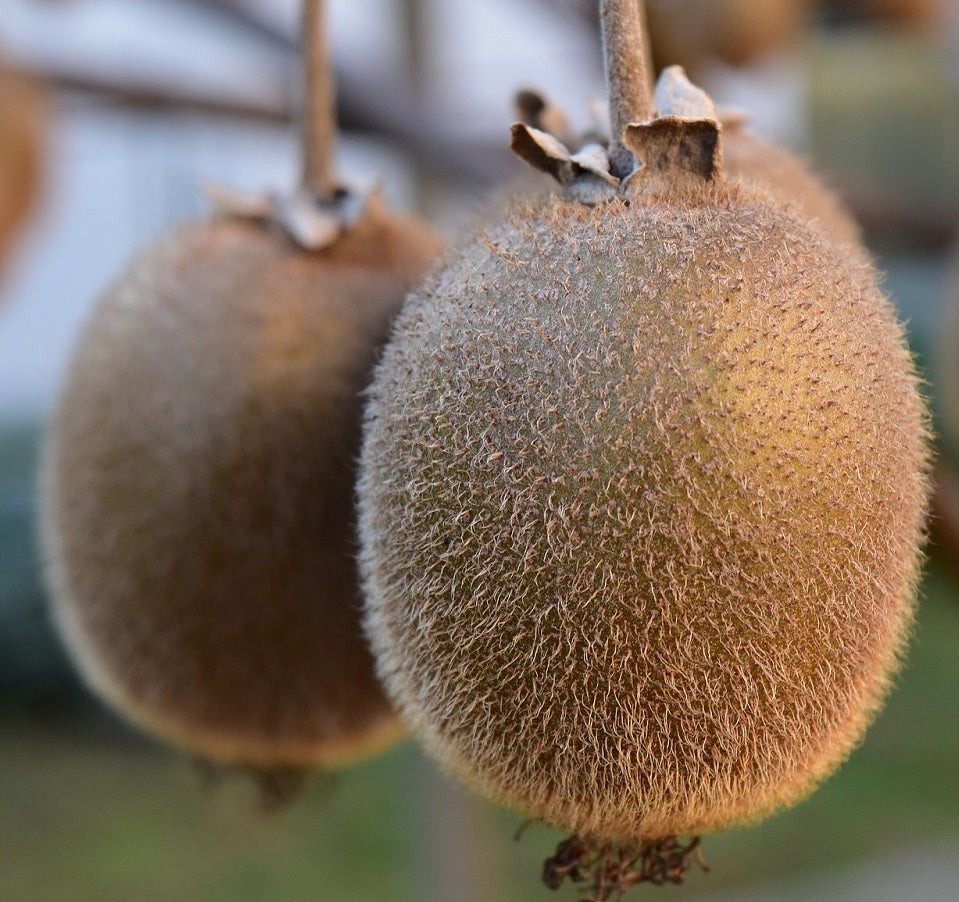
Growing kiwi vines can be incredibly rewarding, producing lush foliage and delicious fruits. Use this guide to learn how to plant, care for, prune, and harvest kiwi successfully.
1. Time of Ripening & Bearing Age
- Kiwi vines begin producing fruit at 2–4 years after planting.
- Ripening occurs from summer to early fall, offering a generous harvest during this season.
2. Site Selection
- Choose a site with full sun exposure for optimal fruit development.
- Ensure well-draining soil to prevent waterlogged roots, as kiwi vines are sensitive to overly saturated conditions.
3. Soil Type
- Prefers slightly acidic to neutral soil (pH 5.5–7.5).
- Rich, well-draining loamy soil promotes healthy root growth.
4. Planting Instructions
Best planting times:
- Cold regions: Spring through summer
- Warm regions: Year-round
- Dig a hole twice as wide and deep as the root ball.
- Set the plant at the same depth it was in the container.
- Water thoroughly after planting.
5. Spacing
- Space kiwi vines 10–12 feet apart to accommodate their vigorous growth.
6. Watering
- Maintain consistent soil moisture, especially during dry spells.
- Water deeply but avoid waterlogged conditions.
- Mulch to retain moisture and suppress weeds.
7. Types of Fertilizer
- Apply a balanced, slow-release fertilizer in early spring.
- Add a side dressing of compost or well-rotted manure during the growing season.
8. Pollination
Kiwi plants are dioecious—they have separate male and female plants.
- Plant 1 male vine for every 4–5 female vines to ensure proper pollination.
9. Pests & Diseases
Common Pests:- Aphids
- Scale insects
- Spider mites
Treatment: Regular inspection and the use of insecticidal soap help control infestations.
Diseases:- Powdery mildew
- Bacterial canker
Prevention & Treatment: Improve air circulation through proper pruning and apply fungicidal sprays when needed.
10. Care by Season
- Spring: Prune to shape vines and encourage lateral branching; apply fertilizer; inspect for pests and disease.
- Summer: Water consistently; monitor for pests; provide support structures for growing vines.
- Fall: Harvest ripe fruit; apply mulch to protect roots over winter.
- Winter: Prune to maintain shape and remove damaged or dead wood.
11. Harvest & Storage
- Harvest kiwis when fruits are firm but give slightly under gentle pressure.
- Cut fruit from the vine using pruning shears, leaving a short stem.
- Store harvested kiwis in the refrigerator for several weeks.
Final Tip: Provide sturdy trellising, consistent watering, and proper pollination to enjoy abundant kiwi harvests year after year.
Fig Tree Planting And Care
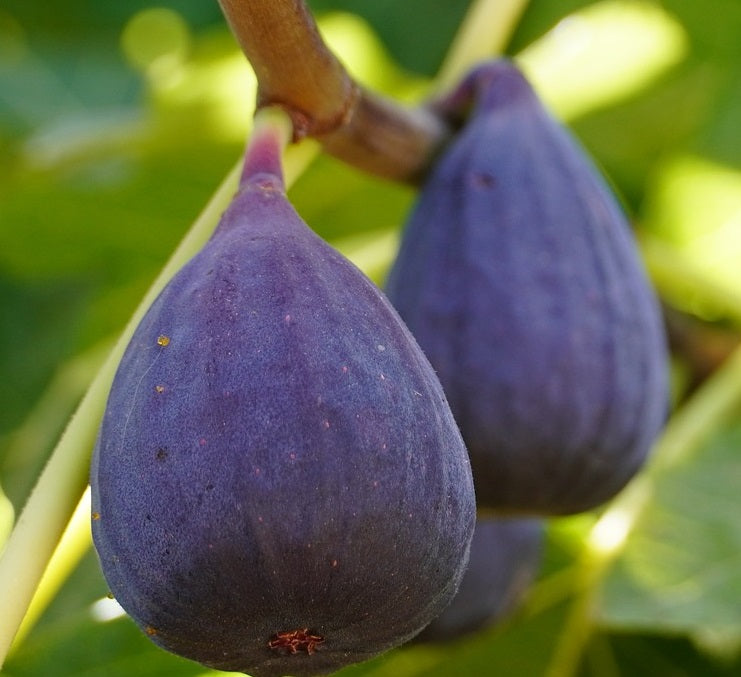
Figs (Ficus carica) are beloved for their sweet, rich fruits and attractive foliage. Whether grown in the ground or in containers, figs are rewarding and surprisingly easy to care for. Use this guide for successful planting, maintenance, and harvesting.
1. Plant Description
Figs are deciduous trees or shrubs with large, lobed leaves. They produce uniquely sweet, juicy fruits and have a natural spreading habit. Many cultivars exist, each offering different fruit colors, flavors, and sizes.
2. Size & Height of Plant
- Typical mature height: 10–30 feet.
- Spread is usually similar to height.
- Pruning can be used to control size and shape.
3. Fruit Description
- Figs are pear-shaped with slightly wrinkled skin when ripe.
- Fruit color ranges from green to purple depending on variety.
- Interior flesh is sweet, ranging from pink to deep red.
- Famous for their honey-like richness and smooth texture.
4. Growing in Containers
- Figs grow exceptionally well in containers.
- Move potted figs indoors during winter (garage, basement, shed, greenhouse).
- Water container figs every 4–8 weeks during winter—just enough to keep roots moist.
- Return figs outdoors once temperatures warm and frost danger has passed.
5. Time of Ripening
Figs typically ripen in late summer to early fall, depending on climate and cultivar.
6. Bearing Age
- Early fruiting begins at 1–2 years.
- Full fruiting potential is reached in 3–5 years.
7. USDA Hardiness Zones
Best grown in Zones 8–11. In colder climates, grow figs in containers so they can be moved indoors for winter protection.
8. Site Selection
- Choose a location with full sun for maximum fruit production.
- Ensure good air circulation to minimize disease.
- Plant in well-draining soil to prevent waterlogging.
9. Soil Requirements
- Preferred pH: 6.0–7.0.
- Best soils: sandy loam or loamy soil.
10. Pruning
Figs fruit on new growth, making pruning essential.
- Prune when young to train into a bush or tree form.
- Prune in early spring before new growth begins.
- Pruning stimulates new wood, which increases fruit production.
11. Pests & Diseases
Common Pests:- Aphids
- Scale insects
- Nematodes
- Root rot
- Fungal infections
Inspect trees regularly and treat early using organic or chemical controls.
12. Spacing
- Space fig trees 10–15 feet apart to allow room for spreading branches.
- Proper spacing improves airflow and reduces disease.
13. Planting Instructions
- Plant figs in late winter or early spring.
- Dig a hole twice as wide as the root ball and of similar depth.
- Place the plant in the center, backfill with soil, and water thoroughly.
14. Watering
- Keep soil consistently moist, especially in dry weather.
- Avoid overwatering to prevent root rot.
15. Fertilizing
Organic Options:- Well-rotted manure
- Compost
- Apply a balanced, slow-release fertilizer in spring.
- Use fertilizers with a balanced N–P–K ratio.
16. Pollination
Most figs are self-pollinating. Some varieties rely on wasps or bees, but many modern cultivars do not require wasp pollination.
17. Harvest & Storage
- Harvest figs when they are plump, soft, and slightly drooping.
- Twist gently to remove fruit from the tree.
- Figs are best enjoyed fresh; they can be refrigerated for a few days.
18. Care by Season
- Spring: Prune to shape and remove dead wood.
- Summer: Mulch to retain moisture and protect roots from heat.
- Fall: Harvest and clean up fallen fruit and leaves.
- Winter: Protect young trees from frost where necessary.
Final Tip: Figs are low-maintenance, rewarding plants. With proper pruning, watering, and sun exposure, your fig tree can produce abundant sweet fruit for many years.
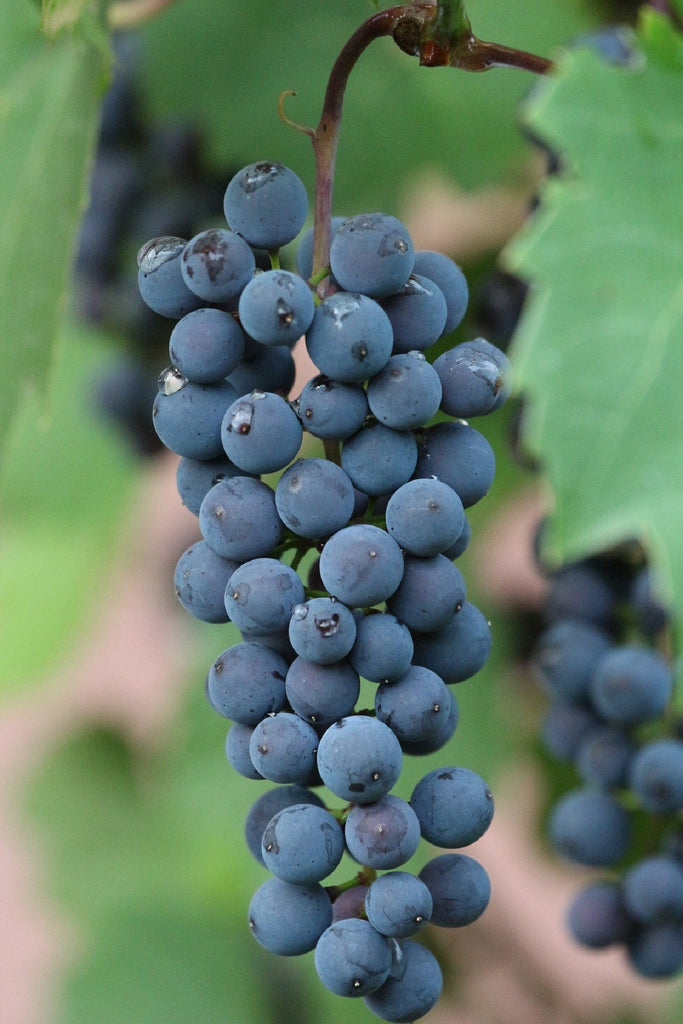
Grape Planting Guide
1. Site Selection:
Choose a sunny location with well-drained soil for planting grapes. Good air circulation is essential to prevent diseases. Grapes prefer slightly alkaline to neutral soil.
2. Time of Year to Plant:
Plant grapes in late fall or early spring when the plants are dormant. This allows them to establish roots before the growing season.
3. Spacing:
Space grapevines 6 to 10 feet apart in rows that are 8 to 12 feet apart. This ensures good air circulation and access to sunlight.
4. Soil Type:
Grapes prefer well-drained soil with a pH between 6.0 and 6.5. Sandy loam or loamy soil is ideal. Amend heavy clay soil with organic matter.
5. Planting:
1. Dig a hole large enough to accommodate the root system.
2. Place the grapevine in the hole, ensuring the root crown is just above the soil surface.
3. Backfill with soil and water thoroughly after planting.
6. Watering:
Keep the soil consistently moist, especially during the first year. Water deeply and regularly, but avoid waterlogged conditions.
7. Fertilizing:
Apply a balanced fertilizer in spring before new growth begins. Follow package instructions and consider soil test recommendations.
8. Pruning:
Prune grapevines in late winter or early spring. Remove dead or weak wood and train the vines to a trellis system for optimal sunlight exposure.
9. Pollination:
Grapes are self-pollinating, meaning they don't require a separate pollinator.
10. Acid Levels:
Grapes prefer slightly acidic to neutral soil. Test soil pH and adjust using lime or sulfur if necessary.
11. Care Through the Seasons:
- Spring: Prune, apply fertilizer, and monitor for pests and diseases.
- Summer: Water consistently, thin out excessive growth, and protect grapes from birds with netting.
- Fall: Harvest ripe grapes, remove leaves around the fruit zone, and consider applying compost.
12. Preparing to Plant:
1. Test soil pH and amend as necessary.
2. Install trellis systems before planting to support vine growth.
3. Clear the planting area of weeds and debris.
4. Consider wind direction when choosing the planting site to avoid damage to vines.
13. Managing Pests and Diseases:
1. Inspect vines regularly for pests like aphids, spider mites, and grape leafhoppers.
2. Apply insecticidal soap or neem oil for minor infestations.
3. Control fungal diseases with fungicides and practice good air circulation.
14. Keeping Grape Vines Healthy:
1. Mulch to retain moisture, suppress weeds, and regulate soil temperature.
2. Prune regularly to promote air circulation and sunlight exposure.
3. Control vine growth to prevent shading and improve grape quality.
15. Harvest and Storage:
1. Harvest grapes when they are fully ripe and have reached the desired sweetness.
2. Table grapes can be eaten fresh, while wine grapes can be processed for winemaking.
3. Store grapes in a cool, humid place or refrigerate for short-term storage.
16. Types of Grapes:
1. Table Grapes: Varieties like Canadice, Vanessa, Lakemont, and Suffolk Red.
2. Wine Grapes: Varieties such as Pinot Gris, Einset, and Golden Muscat.
3. Juice Grapes: Varieties like Concord or Niagara for making grape juice.
17. Choosing Plants:
Select grape varieties based on your climate, intended use (table grapes, wine, or juice), and disease resistance. Consult local nurseries or agricultural extension services for suitable varieties.
Apple Planting Guide: How to Grow Healthy, Productive Apple Trees
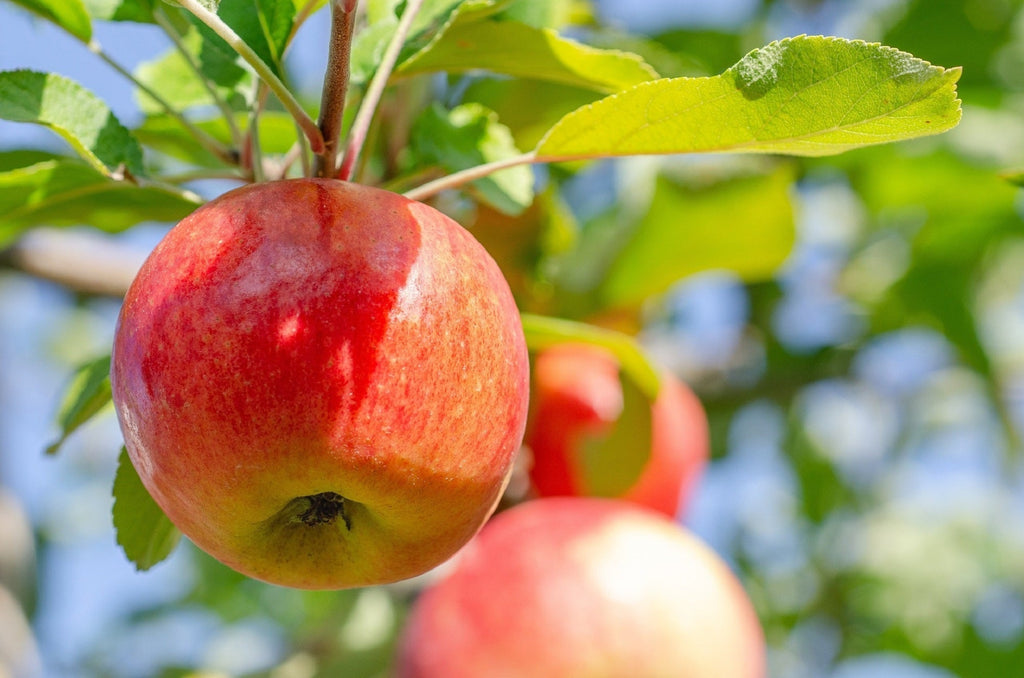
Growing apples (Malus domestica) is a rewarding experience—whether you’re planting one backyard tree or building a full orchard. Use this guide to understand planting, care, pollination, seasonal maintenance, and harvesting so your apples thrive year after year.
1. Plant Description
- Deciduous fruit trees with crisp, sweet or tart fruits
- Fragrant spring blossoms
- Oval-shaped leaves
- A variety of cultivars offering unique flavors and textures
- Attractive spreading canopy
2. Plant Size & Height
- Dwarf: 6–10 ft
- Semi-dwarf: 12–18 ft
- Standard: Up to 25 ft
Tip: Consider your space and preferred tree size when selecting a cultivar.
3. Fruit Description
- Colors: Red, green, yellow
- Flavors: Sweet to tart
- Ripening: Late summer through late fall (variety-dependent)
4. Bearing Age
Apple trees usually begin bearing fruit in 2–4 years, with full production taking a few more years.
5. Site Selection
- Full sun: 6–8 hours daily
- Good air circulation
- Planting on a slope helps avoid late frost damage
6. Soil Requirements
- Well-draining soil
- pH 6.0–7.0
- Loam or sandy loam preferred
Perform a soil test and amend as needed.
7. Pests & Diseases
Pests:
- Aphids
- Codling moths
- Apple maggots
Diseases:
- Apple scab
- Powdery mildew
Choose disease-resistant varieties and inspect trees regularly.
8. Spacing
- Standard trees: 15–20 ft apart
- Dwarf and semi-dwarf: Can be planted closer
9. Planting Instructions
Best planting times:
- Cold climates: Late winter to early spring
- Mild climates: Year-round
- Dig a hole twice as wide as the root ball.
- Keep the graft union 2–3 inches above the soil line.
- Water thoroughly after planting.
(The graft union is the knob where the scion meets the rootstock.)
10. Watering
- Maintain consistent moisture
- Deep watering encourages strong roots
- Mulch helps retain soil moisture
11. Fertilizing
- Apply a balanced fertilizer in early spring
- Organic options: Compost or well-rotted manure
- Follow recommendations based on your soil test
12. Pollination
- Most varieties require cross-pollination
- Plant two varieties that bloom at the same time
- Self-pollinating cultivars are available for small spaces
13. Harvest & Storage
- Pick apples when they are firm and fully colored
- Late-season varieties usually ripen in fall
- Store in a cool, humid place
- Some varieties can last in storage for months
14. Seasonal Care
- Spring: Prune, remove dead wood, apply dormant oil spray
- Summer: Thin fruits; continue pest monitoring
- Fall: Harvest and maintain disease control
- Winter: Mulch; protect roots from freezing
15. USDA Hardiness Zones
Apples grow best in Zones 3–8. Choose cultivars suited to your climate.
Final Tip: Always adapt these guidelines to your specific apple variety and local climate for the best results.
Bamboo Planting and Care Guide
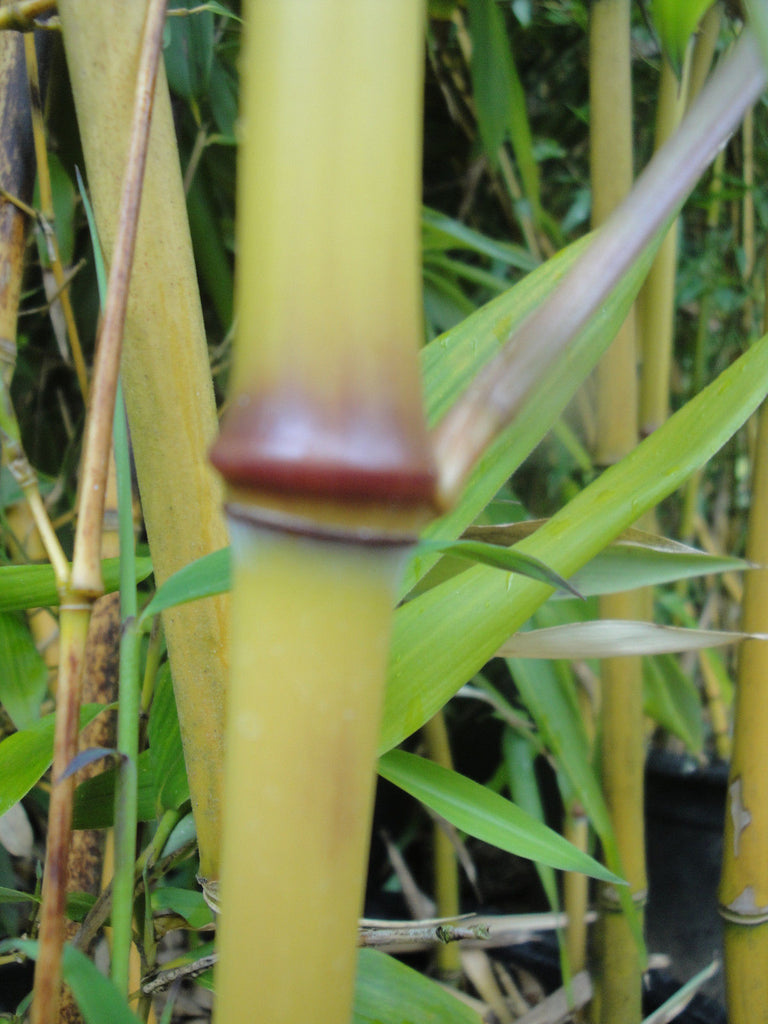
Bamboo is a versatile, fast-growing plant perfect for privacy screens, ornamental gardens, and container displays. Use this guide to plant, maintain, and manage bamboo successfully.
1. Soil and Site Selection
- Preferred Soil: Bamboo thrives in moist, well-drained soil. Avoid swampy or waterlogged areas, which can cause root rot.
-
Clay Soil Warning: Heavy clay is generally unsuitable for bamboo because:
- It stays too wet in winter.
- It dries out too much in summer.
- Roots struggle to spread in compacted soil.
-
Planting Technique in Poor Soil:
- Do NOT dig a large hole and fill it with potting soil — this creates a dangerous “soup bowl” effect that leads to rot.
- Best Approach: Loosen the native soil and plant directly into it.
- Alternatively, mound potting soil or compost above ground and plant bamboo in the mound. This:
- Keeps rhizomes higher in the soil for easier management.
- Improves drainage and prevents rot.
-
Sunlight Requirements: Needs vary by variety:
- Full sun for many species.
- Shade for certain specialty varieties.
2. Planting and Rhizome Management
- Bamboo occasionally sends rhizomes above the soil, especially when grown in mounds. Simply remove these before they travel underground.
- For best control, combine:
- Mounding
- Root pruning
- Rhizome barriers
-
Bamboo in Containers:
- Bamboo grows beautifully in large containers.
- If the container sits on bare ground, place a stepping stone or solid object underneath it.
- This prevents escaping rhizomes from entering the soil and makes them easier to spot and trim.
3. Watering and Irrigation
- First-Year Care: Bamboo needs consistent watering to establish healthy roots.
-
Watering Amount Depends On:
- Soil type
- Mulch coverage
- Rainfall
- Temperature
-
General Watering Rules:
- Keep the root ball moist, allowing slight drying between waterings.
- During summer heat, bamboo leaves may curl mid-day — this is normal. Leaves will relax once temperatures drop.
- Young plants should be watered immediately if curling is observed.
4. Fertilizing
-
Nutrient Preferences: Bamboo loves:
- High nitrogen
- Slightly acidic soil (pH 5.5–6.5)
-
Fertilizing Schedule:
- Top-dress once a year with high-nitrogen fertilizer such as:
- 22-5-10
- 20-10-10
- Avoid hot lawn fertilizers (e.g., 30-0-0 or 50-0-0) because they can burn bamboo roots.
- Organic fertilizers such as compost, manure, guano, corn gluten, and blood meal work very well but need more frequent application.
- Weekly waterings with liquid nitrogen plus iron can boost growth; iron slightly acidifies the soil.
- Top-dress once a year with high-nitrogen fertilizer such as:
- Best Fertilizing Time: Late March to early May — just before new shoots emerge.
5. Pruning and Maintenance
-
Running Bamboo: Does not require regular pruning, but prune to:
- Remove dead culms and branches annually.
- Thin groves or hedges to reveal colorful culms.
- Maintain a hedge-like appearance (similar to photinia, laurel, or privet).
- Dwarf Bamboo: Can be mowed yearly to keep it full and healthy.
-
Clumping Bamboo:
- Prune to remov
Planting Guide for Blueberries
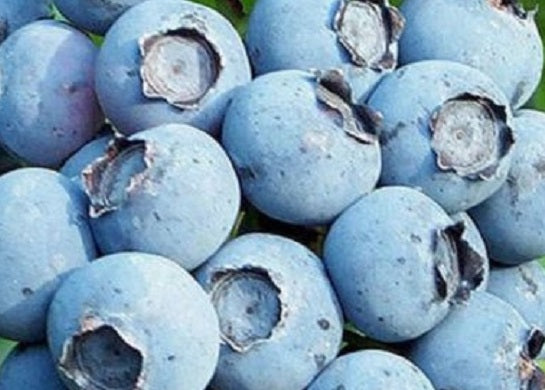
Blueberries are nutritious, delicious, and beautiful additions to any garden. With the right soil, site selection, and care, blueberry bushes can produce abundant harvests year after year. Use this guide to ensure your plants thrive.
Summer Planting:
When planting smaller, younger plants, it's important not to place them in full sun during the hot summer months. The intense heat can stress the plant and possibly kill it. Instead:
- Transplant into a container.
- Place the plant in a shaded or partially shaded area.
- Move to full sun only once temperatures cool.
This helps the plant acclimate safely without being overwhelmed by heat.
1. Plant Description
Blueberries (Vaccinium spp.) are deciduous shrubs in the Ericaceae family. They are known for:
- Small, round berries ranging from blue to purple-black
- Sweet-tangy flavor
- Ovate leaves that turn red and yellow in fall
2. Size & Height of Plant
- Compact varieties: ~2 feet tall
- Larger varieties: up to 6+ feet tall
3. Fruit Description & Time of Ripening
- Clusters of small, sweet-tart berries
- Ripening depends on variety:
- Early summer for early varieties
- Late summer–early fall for late varieties
4. Bearing Age
- Begins fruiting at 2–3 years
- Full production by year 5
5. USDA Hardiness Zones
Blueberries grow best in Zones 3–7, though specific varieties may have additional requirements.
6. Site Selection
- Choose a site with full sun for best yields.
- Requires well-drained, acidic soil (pH 4.5–5.5).
- Ensure good air circulation to reduce disease pressure.
7. Soil Requirements
- Acidic, well-draining soil is essential.
- Amend with:
- Peat moss
- Compost
8. Pests & Diseases
Common Pests:
- Birds
- Aphids
- Spider mites
Common Diseases:
- Powdery mildew
- Mummy berry
Tip: Use bird netting to protect fruit and apply organic or chemical treatments as needed.
9. Spacing
- Plant blueberries 4–6 feet apart
- Space rows 8–10 feet apart
10. Planting Instructions
- Plant in early spring or late fall.
- Dig a hole twice the size of the root ball.
- Plant at the same depth as in the nursery pot.
- Backfill with amended soil.
- Water thoroughly.
- Apply mulch to retain moisture and regulate soil temperature.
11. Watering
- Keep soil evenly moist, especially during dry periods.
- Mulching prevents weeds and helps maintain consistent moisture.
12. Fertilizing (Organic or Inorganic)
- Fertilize in early spring with a slow-release, acidic fertilizer designed for blueberries.
- Organic options include:
- Well-rotted compost
- Pine needle mulch
- Coffee grounds
13. Pollination
Blueberries are self-pollinating, but planting multiple varieties improves fruit set. Bees and other pollinators enhance yields.
14. Harvest & Storage
- Pick berries when fully ripe and easily detach from the stem.
- Store in the refrigerator for up to two weeks.
- Freeze for long-term storage.
15. Care by Season
- Spring: Prune dead/damaged branches and fertilize.
- Summer: Water consistently; monitor for pests and diseases.
- Fall: Mulch to protect roots.
- Winter: Cover with burlap in very cold climates.
Final Tip: Because different blueberry varieties have unique needs, always check the specific care instructions for the cultivars you plant.
Planting Guide for Hydrangeas
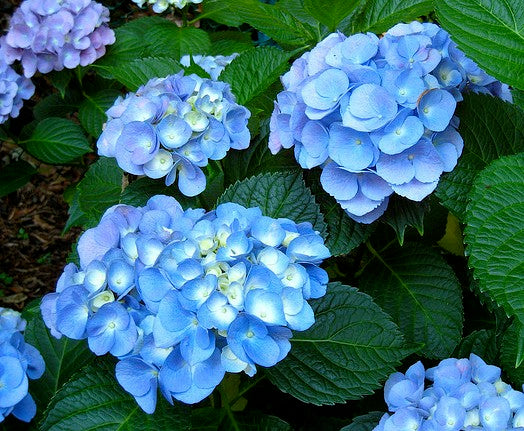
Hydrangeas are beautiful flowering shrubs that add color and texture to your garden. Follow this guide to ensure healthy growth, vibrant blooms, and long-term success.
1. Summer Planting
Important: When planting smaller, younger hydrangeas during hot summer months, do NOT place them in full sun. Intense heat can stress the plant and even kill it. Instead:
- Transplant into a container.
- Place the plant in a shaded spot until the weather cools.
- Move the plant to its permanent spot once temperatures are moderate.
This allows the plant to acclimate safely without being overwhelmed by the summer sun.
2. Site Selection
Hydrangeas thrive in locations with:
- Light Requirements: Partial sun to partial shade (4–6 hours per day). Too much sun can scorch leaves; too little reduces blooms.
- Protection from Wind: Wind can dry out plants and damage flowers. Choose a protected location.
- Good Drainage: Avoid low-lying areas where water pools. Hydrangeas dislike "wet feet" and need well-draining soil.
3. Spacing
Spacing depends on variety:
- Small varieties: 3–4 feet apart.
- Larger varieties (e.g., Panicle Hydrangeas): 6–10 feet apart.
Proper spacing ensures good air circulation and reduces disease risk.
4. Soil Type
Hydrangeas prefer:
- Moist, well-drained soil: Loamy soil that retains moisture but drains well.
-
pH Sensitivity: Bigleaf hydrangeas (H. macrophylla) change bloom color based on soil pH:
- Acidic soil (pH < 6.0): Blue flowers.
- Neutral to alkaline soil (pH 6.5+): Pink or red flowers.
- Soil Amendments: Add organic matter like compost to improve structure and fertility.
5. Planting Hydrangeas
- Dig the Hole: About twice the size of the root ball, no deeper than the root ball itself.
- Amend the Soil: Mix in compost or aged manure for drainage and fertility.
- Planting Depth: Crown (where stem meets roots) should be level with surrounding soil.
- Water Well: Water deeply after planting to settle soil and establish roots.
6. Watering
- Water deeply: About 1 inch per week, more during hot/dry weather. Encourages deep root growth.
- Mulching: 2–3 inches around the base to retain moisture and keep soil cool.
7. Fertilizing
- Fertilize in early spring before new growth.
- Optional second application in early summer.
- Use balanced, slow-release fertilizer (10-10-10 or 12-4-8). Avoid over-fertilizing to prevent excessive foliage at the expense of blooms.
8. Pruning
- Bigleaf & Oakleaf Hydrangeas: Prune right after blooming (old wood).
- Panicle & Smooth Hydrangeas: Prune late winter or early spring (new wood).
- Deadheading: Remove spent blooms to encourage additional flowers.
9. Soil Acidity & Bloom Color
- Blue flowers: Lower pH with sulfur or aluminum sulfate.
- Pink flowers: Raise pH with lime to make soil more alkaline.
With proper care, your hydrangeas will thrive and produce stunning blooms year after year. Enjoy your garden!
Planting Guide for Ornamental Grass
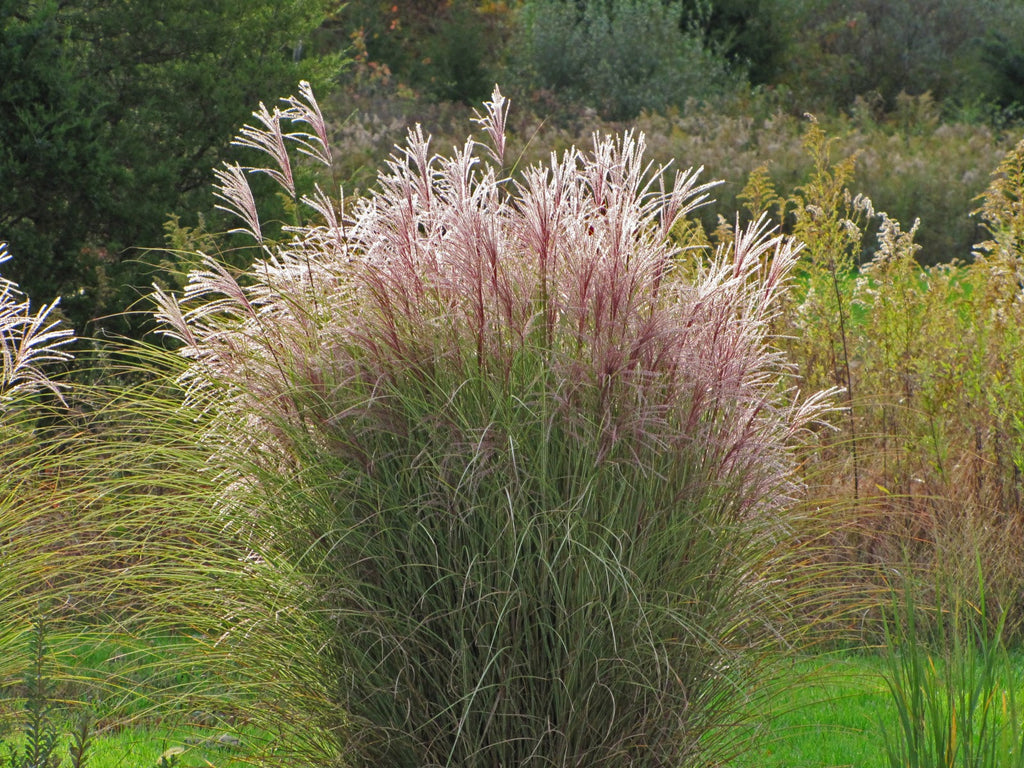
Ornamental grasses add texture, movement, and year-round interest to gardens. They come in various colors, sizes, and growth habits, and can be used for ground cover, borders, privacy screens, or as focal points. Many species are drought-tolerant, low-maintenance, and provide habitat for wildlife.
1. Plant Description
Ornamental grasses are versatile, low-maintenance plants that enhance garden landscapes with their form, color, and seasonal movement.
2. Size and Height of Plant
Ornamental grasses range from compact, low-growing varieties (6–12 inches) to tall, dramatic specimens reaching 8–12 feet. Height depends on species and growing conditions.
3. Site Selection
Choose a site based on the grass variety's light and moisture requirements:
- Most grasses prefer full sun (at least 6 hours/day), while some thrive in partial shade.
- Ensure good air circulation to prevent disease.
4. Soil
Ornamental grasses adapt to various soil types but perform best in well-draining soil. Some species prefer sandy or rocky soils, while others tolerate clay. Adding organic matter improves soil structure and fertility.
5. Pests and Diseases
Generally resistant, but occasional issues include:
- Fungal infections such as rust or leaf spot
- Insect pests like aphids or grasshoppers
Prevent problems with proper spacing, good air circulation, and avoiding overhead watering.
6. Spacing
Depends on species and mature size:
- Small grasses: 12–18 inches apart
- Larger varieties: 2–4 feet apart to accommodate full growth
7. Planting
- Planting time: Most grasses can be planted year-round depending on local climate; avoid extreme heat and freezing temperatures.
- Dig a hole twice the width of the root ball and as deep as the container.
- Place the plant in the hole, crown level with the soil surface.
- Backfill with soil and water thoroughly.
- Apply a layer of mulch to retain moisture and suppress weeds.
8. Watering
- New plants: Regular watering until established (first few months).
- Mature plants: Many species are drought-tolerant; water deeply only during dry spells.
9. Fertilizer
- Most grasses thrive with minimal fertilization.
- Apply a balanced, slow-release fertilizer in early spring if needed.
- Avoid excessive nitrogen, which can cause weak, floppy growth.
10. Pollination
Most ornamental grasses are wind-pollinated. Seed heads add visual interest and provide food for birds.
11. Care by Season
- Spring: Cut back dead foliage, apply mulch/fertilizer if needed, divide overcrowded clumps.
- Summer: Water during dry periods, especially for young plants; monitor for pests or diseases.
- Fall: Allow grasses to go dormant; many develop attractive fall colors.
- Winter: Leave foliage standing for winter interest and wildlife shelter; cut back in late winter or early spring before new growth.
12. USDA Zone
Hardiness varies by species. Many are suited for USDA Zones 3–10. Some cold-hardy varieties tolerate extreme winters, while others thrive in warmer climates.
By following these guidelines, ornamental grasses can enhance landscapes with their low-maintenance beauty and seasonal appeal.
Raspberry Planting Guide
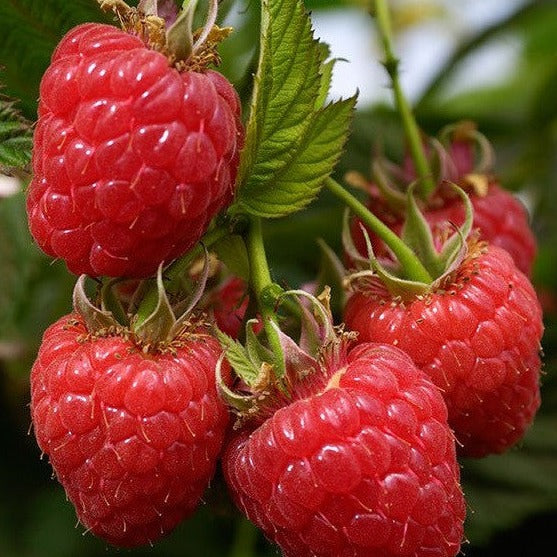
Raspberries are a rewarding fruit to grow, offering sweet, juicy berries. Follow these care guidelines to ensure healthy plants and a productive harvest.
1. Summer Planting
When planting smaller, younger raspberry plants, avoid placing them in full sun during the hot summer months. The intense heat can stress the plant and potentially kill it. Instead:
- Consider transplanting the plant into a container.
- Place the plant in a shaded spot until the weather cools down.
- This allows the plant to acclimate without being overwhelmed by the summer sun and heat.
2. Site Selection
- Choose a sunny location with well-drained soil.
- Avoid low-lying areas prone to early-season frosts and areas with heavy clay soil.
- Ensure adequate air circulation to help prevent diseases.
3. Time of Year to Plant
- Plant dormant raspberry canes in late fall or early spring.
- Container plants can be planted year-round in areas with mild winters.
- Spring planting is preferable for areas with harsh winters.
4. Soil Preparation
- Raspberries prefer slightly acidic to slightly alkaline soil with a pH of 5.5–6.5.
- Amend the soil with well-rotted compost or aged manure to improve fertility.
- Ensure good drainage to prevent root rot.
5. Planting
- Space plants 2–3 feet apart in rows, with rows 6–8 feet apart.
- Plant canes at the same depth they were grown in the nursery container.
- Water thoroughly after planting to settle the soil around the roots.
6. Watering
- Keep the soil consistently moist, especially during dry periods.
- Water at the base of the plant to avoid wetting the foliage.
- Reduce watering in winter to prevent root rot.
7. Fertilizing
- Apply a balanced fertilizer in early spring before new growth begins.
- Use a fertilizer with higher phosphorus content to support better fruit production.
- Avoid excessive nitrogen, as it can encourage too much vegetative growth at the expense of fruiting.
8. Pruning
Spring-Bearing Raspberries:
- Prune all canes that bore fruit to ground level after harvesting.
- Thin remaining canes, leaving 4–6 of the healthiest per square foot.
- Tie canes to a support system to prevent them from bending under the weight of fruit.
Ever-Bearing Raspberries:
- Prune the entire plant to ground level in late winter or early spring to promote a larger fall crop.
- This minimizes the summer harvest and focuses energy on the fall fruiting period.
- Remove spent floricanes (the canes that bore fruit) after each fruiting period.
9. Support Structures
- Install a trellis or support system for the canes to keep them upright.
- This improves air circulation and makes harvesting easier.
10. Pest and Disease Control
- Monitor for pests like aphids and Japanese beetles.
- Fungal diseases can be controlled with proper spacing and fungicide applications if necessary.
11. Harvesting
- Harvest ripe berries gently to avoid damaging the plant.
- Pick berries regularly to encourage continuous fruiting.
12. Winter Care
- Mulch around plants in late fall to protect roots from freezing temperatures.
- In severe winter climates, consider covering plants with burlap for extra protection.
Remember, specific care practices may vary based on raspberry variety and local climate. Regular monitoring and adjustments will help ensure a healthy, productive raspberry patch.