Planting Tips, D-I-Y Projects and More
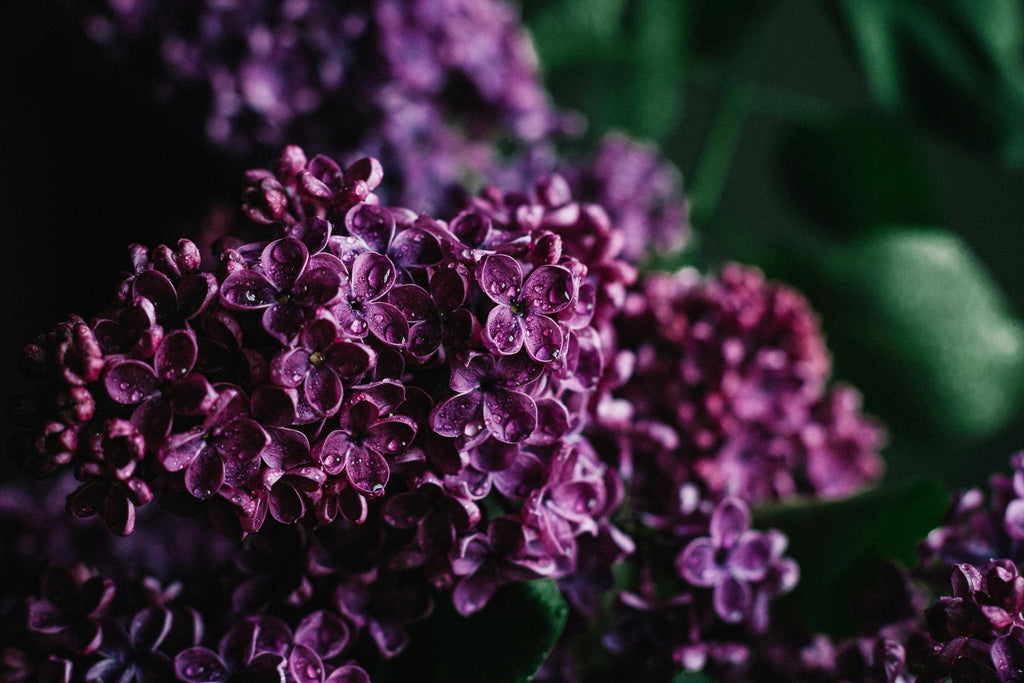
Planting Guide for Lilacs
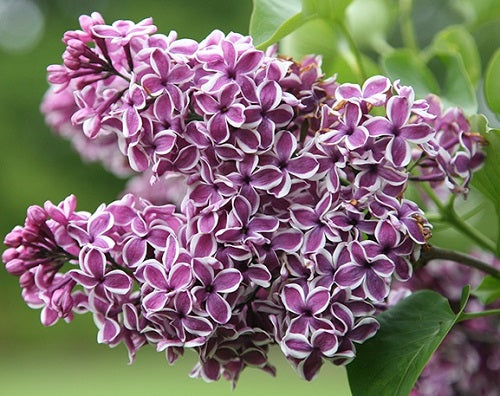
Lilacs are cherished for their fragrant blooms and attractive, hardy nature. Here's how to grow and care for your lilacs to ensure a beautiful garden display year after year.
1. Summer Planting
When planting smaller, younger lilacs during the hot summer months, it's crucial not to place them in full sun. The intense heat can stress the plant and potentially kill it. Instead:
- Consider transplanting the plant into a container.
- Place the plant in a shaded spot until the weather cools down.
- This allows the plant to acclimate without being overwhelmed by the summer sun and heat.
2. Site Selection
- Choose a site that receives full sun to partial shade, with well-draining soil.
- Lilacs prefer slightly alkaline soil but can tolerate a range of soil types.
3. Time of Year to Plant
- The best time to plant lilacs is late fall or early spring when the soil is workable and temperatures are cooler.
- However, in many parts of the country, lilacs can be planted year-round.
4. Spacing
- Space lilac bushes approximately 5 to 15 feet apart, depending on the variety and desired effect.
5. Soil Type
- Lilacs prefer well-draining soil with a pH level between 6.5 and 7.5.
- If your soil is too acidic, you can add lime to raise the pH level.
6. USDA Zones
- Lilacs generally grow best in USDA Zones 3–8.
- They are cold-hardy and can survive winter temperatures as low as -40°F (-40°C) in Zone 3.
- However, lilacs require a period of winter chill (cold dormancy) to produce flowers in the spring, making them less suited for warmer climates like Zones 9 and above.
7. Planting
- Dig a hole twice as wide and just as deep as the lilac's root ball.
- Place the lilac in the hole, ensuring the top of the root ball is level with the surrounding soil.
- Backfill the hole with soil, gently firming it around the roots.
- Water thoroughly after planting to settle the soil.
8. Watering
- Keep the soil evenly moist, especially during the first year after planting.
- Once established, lilacs are drought-tolerant but will benefit from regular watering during dry spells.
9. Fertilizing
- Apply a balanced fertilizer in early spring before new growth appears, following the manufacturer's instructions.
- Avoid over-fertilizing, as this can lead to excessive vegetative growth at the expense of flowers.
10. Pruning
- Prune lilacs immediately after flowering, removing spent flower clusters and any dead or diseased wood.
- Thin out crowded branches to improve air circulation and overall plant health.
- Avoid heavy pruning, as lilacs bloom on old wood.
11. Acid Levels
- Lilacs prefer slightly alkaline soil but can tolerate a range of pH levels.
12. Care Through the Seasons
- Spring: Monitor soil moisture and apply fertilizer if needed. Prune immediately after flowering.
- Summer: Keep the soil evenly moist, especially during hot, dry periods. Mulch around the base of the plant to conserve moisture and suppress weeds.
- Fall: Continue to water until the ground freezes. Consider applying a layer of mulch to protect the roots during winter.
- Winter: Lilacs are hardy, but in colder climates, protect young plants with burlap or other insulation for extra protection.
13. Preparing to Plant
- Before planting, prepare the soil by incorporating organic matter such as compost or aged manure to improve drainage and fertility.
14. Managing Pests and Diseases
- Common pests include aphids, borers, and powdery mildew.
- Monitor plants regularly and treat infestations promptly with insecticidal soap or horticultural oil.
- Provide good air circulation and avoid overhead watering to prevent powdery mildew.
15. Keeping Lilacs Healthy
- Maintain good cultural practices, including proper watering, fertilizing, and pruning.
- Regularly monitor plants for signs of pests or diseases and address any issues promptly.
16. Types of Lilacs
- There are many varieties of lilacs, including common lilac (Syringa vulgaris), dwarf Korean lilac (Syringa meyeri), and Japanese lilac (Syringa reticulata).
- Choose a variety that suits your climate and space requirements.
17. Choosing Lilacs
When selecting lilacs for your garden, consider factors such as bloom color, fragrance, mature size, and bloom time. Choose varieties that are well-suited to your climate and soil conditions for optimal growth and flowering.
Planting Guide for Rhododendrons
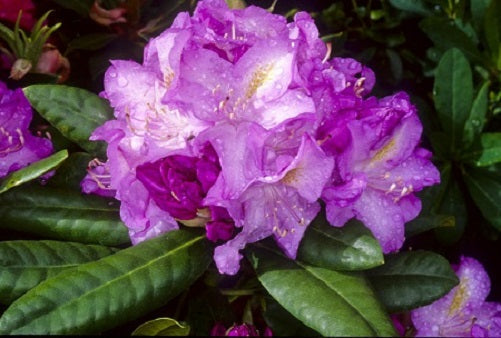
Rhododendrons are beautiful, shade-loving shrubs known for their vibrant blooms and evergreen foliage. Here's how to plant, care for, and maintain healthy rhododendrons in your garden.
1. Summer Planting
When planting smaller, younger rhododendrons during the hot summer months, it’s crucial not to place them in full sun. The intense heat can stress the plant and potentially kill it. Instead:
- Transplant the plant into a container.
- Place the plant in a shaded spot until the weather cools down.
- This gives your plant the chance to acclimate and thrive without being overwhelmed by the summer heat.
2. Site Selection
- Choose a location that offers partial shade to full shade with well-draining soil.
- Avoid areas with strong winds or extreme sunlight exposure.
3. Time of Year to Plant
- Plant rhododendrons in the spring or fall when temperatures are cooler and the weather is mild.
- Avoid planting during the hottest part of summer or in freezing winter temperatures.
4. Spacing
- Space rhododendrons according to their mature size, typically 2 to 6 feet apart, depending on the variety.
5. Soil Type
- Rhododendrons prefer acidic soil with a pH range of 4.5 to 6.0.
- Ensure the soil is rich in organic matter and well-draining to prevent waterlogging.
6. Planting
- Dig a hole twice as wide as the root ball and slightly shallower than the root ball’s depth.
- Place the rhododendron in the hole, ensuring the top of the root ball is level with the surrounding ground.
- Backfill the hole with soil, lightly tamp it down, and water thoroughly to settle the soil.
7. Watering
- Keep the soil consistently moist, especially during the first growing season.
- Water deeply and infrequently, allowing the soil to dry out slightly between waterings.
8. Fertilizing
- Apply a balanced, slow-release fertilizer formulated for acid-loving plants in the spring, after the last frost.
- Follow the manufacturer's instructions for application rates.
9. Care Through the Seasons
- Spring: Monitor for signs of new growth and adjust watering and fertilizing accordingly. Remove spent flowers after blooming.
- Summer: Mulch around the base of the plant to retain moisture and suppress weeds. Water during dry spells.
- Fall: Apply a layer of mulch to protect the roots from winter cold and moisture fluctuations.
- Winter: Protect rhododendrons from extreme cold and drying winds by wrapping them with burlap or providing a windbreak.
10. Preparing to Plant
- Before planting, amend the soil with organic matter such as compost or peat moss to improve drainage and fertility.
- Test the soil pH and adjust it if necessary to ensure the proper acidity for rhododendrons.
11. Managing Pests and Diseases
- Watch for common pests such as aphids, lace bugs, and spider mites.
- Treat infestations promptly with insecticidal soap or neem oil.
- Monitor for signs of diseases such as powdery mildew or root rot.
- Ensure good air circulation around the plant to prevent fungal issues.
12. Keeping Rhododendrons Healthy
- Regularly monitor the health of your rhododendrons by inspecting leaves for signs of discoloration, wilting, or pest damage.
- Provide proper care, including watering, fertilizing, and pruning, to keep the plants healthy and vigorous.
13. Choosing Rhododendrons
When selecting rhododendrons for your garden, consider factors such as mature size, flower color, bloom time, and growth habit. Choose varieties that suit your climate, soil conditions, and aesthetic preferences for the best results.
Planting Guides

Welcome to Our Planting Guides
Welcome to our collection of Planting Guides! Whether you're a beginner or a seasoned plant enthusiast, our easy-to-follow guides will help you care for your plants and keep them thriving.
- Bamboo Planting and Care
- Blackberry Planting and Care
- Blueberry Planting and Care
- Fig Tree Planting and Care
- Grape Planting and Care
- Hydrangea Planting and Care
- Kiwi Planting and Care
- Lilac Planting and Care
- Ornamental Grass Planting and Care
- Planting Guide for Apples
- Raspberry Planting and Care
- Rhododendron Planting and Care
Top Clumping Bamboo Varieties for Small Gardens
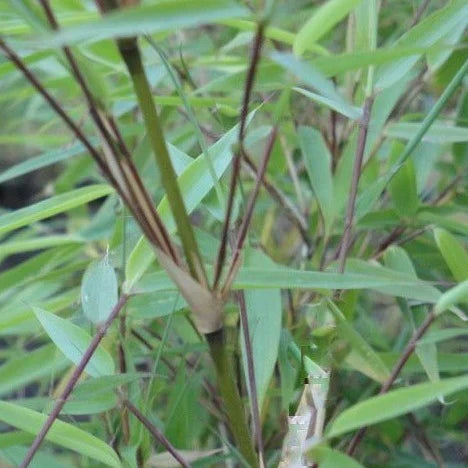
Bamboo is a versatile, elegant, and fast-growing plant that can add beauty, privacy, and a touch of exotic charm to any garden. However, many gardeners shy away from bamboo due to its reputation for being invasive and difficult to manage. The solution? Clumping bamboo varieties! Unlike running bamboo, clumping varieties grow in tight, non-invasive clusters, similar to ornamental grass, making them ideal for small gardens. Here are some of the top clumping bamboo varieties to consider for your outdoor space.
1. Fargesia Murielae (Umbrella Bamboo)
Fargesia murielae, commonly known as Umbrella Bamboo, is a popular choice for small gardens. It features upright culms and vibrant green foliage. Growing up to 15 feet tall in optimal conditions, this bamboo can also be pruned to maintain a shorter height. Its non-invasive nature and elegant appearance make it perfect for creating privacy screens or a lush backdrop.
Key Features:
-
Height: 10-15 feet
-
Hardiness: USDA zones 6-9
-
Uses: Privacy screen, ornamental planting
2. Bambusa Multiplex (Hedge Bamboo)
Bambusa multiplex is another excellent option for small gardens, particularly if you’re looking for a dense hedge or windbreak. This bamboo grows quickly into a thick, bushy clump and can reach heights of 6-12 feet depending on the variety.
Key Features:
-
Height: 6-12 feet
-
Hardiness: USDA zones 8-11
-
Uses: Hedges, decorative borders
3. Fargesia Rufa (Green Panda Bamboo)
Fargesia rufa is a cold-hardy clumping bamboo that thrives in partial shade, making it ideal for temperate climates. Its arching canes and soft, feathery foliage provide a graceful look. This bamboo grows to about 6-10 feet tall, making it manageable for small gardens and containers.
Key Features:
-
Height: 6-10 feet
-
Hardiness: USDA zones 5-9
-
Uses: Ornamental planting, container gardening
4. Fargesia Nitida (Blue Fountain Bamboo)
Known for its slender, arching canes and powdery blue hue, Fargesia nitida adds a unique visual appeal to any garden. This bamboo grows in compact clumps and can reach heights of 8-12 feet, making it suitable for smaller spaces. Its graceful form and striking color make it a standout in ornamental gardens.
Key Features:
-
Height: 8-12 feet
-
Hardiness: USDA zones 5-9
-
Uses: Focal points, privacy screens
5. Fargesia Robusta
Fargesia robusta is a shade-tolerant bamboo with an upright growth habit and vibrant green foliage. It grows in tight clumps and can reach a height of 8-15 feet. This variety is especially well-suited for small gardens in cooler climates.
Key Features:
-
Height: 8-15 feet
-
Hardiness: USDA zones 6-9
-
Uses: Privacy screens, ornamental accents
Tips for Growing Clumping Bamboo
-
Choose the Right Location: Most clumping bamboo varieties prefer well-drained soil and a mix of sun and shade. Check the specific requirements of your chosen variety.
-
Provide Adequate Water: Bamboo will need regular watering until it is established, however, it will not tolerate waterlogged soil.
-
Fertilize Regularly: Feed your bamboo with a balanced fertilizer to encourage healthy growth and vibrant foliage.
-
Prune as Needed: Pruning helps maintain the desired height and removes old or damaged culms to promote new growth.
-
Use Containers For More Flexibility: If you’re concerned about space or want to move your bamboo around, many clumping varieties thrive in large pots.
Conclusion
Clumping bamboo is a fantastic addition to small gardens, offering beauty, functionality, and easy maintenance. Whether you want a lush privacy screen, an exotic focal point, or a low-maintenance container plant, there’s a clumping bamboo variety to suit your needs. With proper care, these non-invasive plants will bring years of joy and tranquility to your outdoor space.
The Joy of Growing Your Own Fruit at Home
There’s something magical about plucking ripe, juicy fruit straight from your own backyard. Growing your own fruit isn’t just about cultivating food—it’s about cultivating joy, health, and a deeper connection to nature. Whether you have a sprawling garden, a modest backyard, or just a sunny balcony, the journey of growing fruit can be as rewarding as the harvest itself.
A Feast for the Senses
Imagine biting into a sun-warmed fig or a crisp apple that you’ve nurtured from a tiny seedling. The taste of homegrown fruit is unmatched, bursting with freshness and flavor that supermarket produce often lacks. Beyond taste, there’s the visual delight of watching your plants grow, the vibrant colors of ripening fruit, and the gentle rustle of leaves in the breeze. Even the earthy scent of soil and the occasional buzz of a pollinating bee add to the sensory symphony of homegrown fruit.
Health and Wellness Benefits
Growing your own fruit is a fantastic way to ensure your diet is rich in vitamins and minerals. You’ll know exactly what has gone into your food, whether it’s organic compost or pesticide-free care. Gardening itself is also a great form of exercise, helping to improve flexibility, strength, and endurance. Additionally, spending time in nature has been shown to reduce stress, boost mood, and improve mental clarity—a perfect complement to the physical health benefits of gardening.
A Connection to Nature
Tending to fruit plants fosters a sense of responsibility and patience. Watching a fruit tree transform through the seasons—from budding flowers to fruit-bearing branches—reminds us of nature’s rhythms. This connection is grounding in our fast-paced, technology-driven lives. It’s a quiet reminder of the beauty and simplicity of life’s cycles.
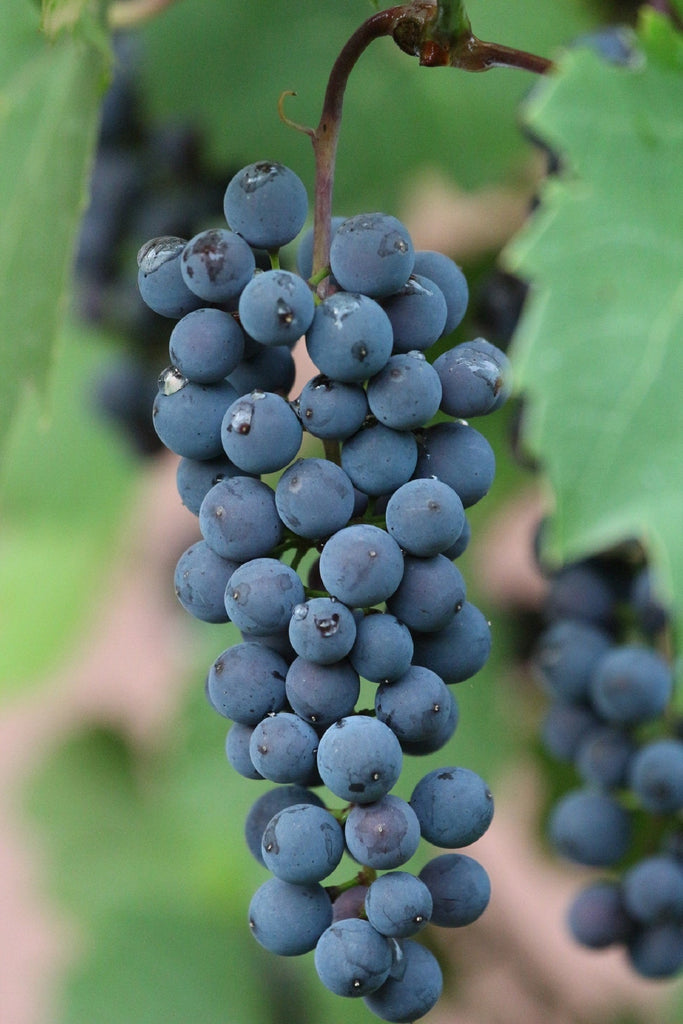
Cost Savings and Sustainability
Once established, a fruit garden can save money on groceries. Imagine never having to buy grapes, blueberries, or raspberries again! Growing your own fruit also reduces your carbon footprint by minimizing the energy and packaging associated with store-bought produce. Plus, many fruit plants can be propagated, meaning you can share the joy with friends and family by giving them cuttings or seedlings.
Tips for Starting Your Fruit Garden
-
Choose the Right Plants: Start with fruit that thrives in your climate. Raspberries, apples, and blueberries are great options for beginners.
-
Start Small: You don’t need a huge garden to grow fruit. Many plants can be grown in pots or containers, making them perfect for patios and balconies.
-
Invest in Quality Soil: Healthy soil is the foundation of a productive garden. Use nutrient-rich compost to give your plants a strong start.
-
Be Patient: Fruits like apples or grapes might take a few years to bear harvestable produce, but the wait is worth it. Faster options like blackberries or raspberries can provide quicker gratification.
-
Learn as You Go: Gardening is a journey of trial and error. Don’t be discouraged by setbacks; each season is an opportunity to learn and grow.
The Sweetest Reward
The joy of growing your own fruit lies not only in the harvest but in the process itself. From the moment you plant a seed or a sapling, you’re investing in something greater than food. You’re creating memories, nurturing life, and building a legacy for yourself and your loved ones. So roll up your sleeves, dig into the dirt, and let the sweetness of homegrown fruit enrich your life.
Top Lilac Varieties for Fragrant Gardens
When it comes to filling your garden with delightful scents and stunning blooms, lilacs are a perennial favorite. These low-maintenance shrubs not only add beauty to your landscape but also infuse the air with their intoxicating fragrance. With hundreds of varieties to choose from, you can find the perfect lilac to suit your garden style and climate. Here are some top lilac varieties that are sure to enhance your fragrant garden.
1. Sensation Lilac (Syringa vulgaris ‘Sensation’)
Sensation Lilac lives up to its name with its striking bicolor blooms. Each flower is deep purple with white edges, creating a dramatic effect. This variety is as fragrant as it is beautiful, blooming in late spring.
Best for: Eye-catching focal points and unique garden displays.
2. President Grevy Lilac (Syringa vulgaris ‘President Grevy’)
President Grevy is a majestic variety with large, double lavender-blue flowers. Known for its powerful fragrance, this lilac blooms in mid-to-late spring and can grow up to 12 feet tall. Its elegant blooms make it a standout choice for any garden.
Best for: Formal gardens, hedges, and large landscapes.
3. Wonderblue Lilac (Syringa vulgaris ‘Wonderblue’)
Wonderblue is a compact lilac variety with soft, powder-blue flowers. Its blooms are sweetly fragrant and appear in late spring. This variety’s unique color and manageable size make it a favorite for smaller gardens or as a border plant.
Best for: Small spaces, container gardening, and unique color accents.
4. Yankee Doodle Lilac (Syringa vulgaris ‘Yankee Doodle’)
For those who love deep, rich colors, Yankee Doodle is an excellent choice. This variety produces abundant clusters of dark purple flowers with a strong, sweet fragrance. It’s a mid-to-late spring bloomer and reaches up to 8 feet in height.
Best for: Bold garden displays, hedges, and fragrance enthusiasts.
Tips for Growing Lilacs
-
Sunlight: Lilacs thrive in full sun, requiring at least 6 hours of direct sunlight daily.
-
Soil: Well-draining, slightly alkaline soil is ideal for healthy growth.
-
Pruning: Prune immediately after flowering to encourage new growth and maintain shape.
-
Spacing: Ensure adequate spacing to allow for good air circulation and reduce the risk of powdery mildew.
With these varieties and tips, you can transform your garden into a fragrant haven that delights the senses. Whether you prefer traditional lilacs or unique cultivars, there’s a perfect lilac for every gardener. Happy planting
DIY Apple Recipes Straight from Your Backyard
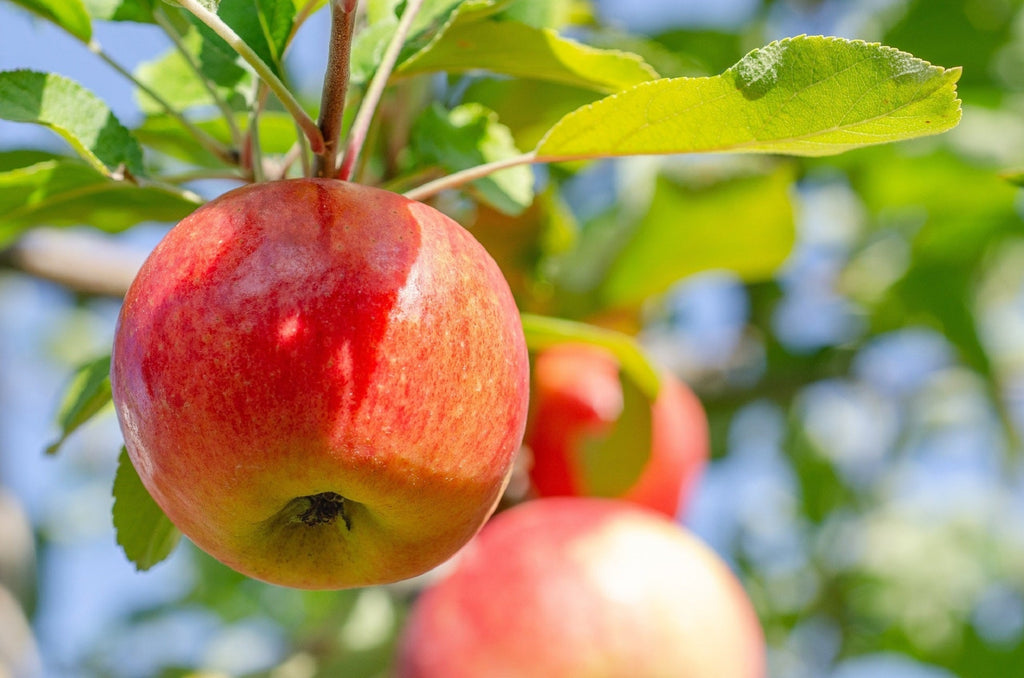
If you’re lucky enough to have an apple tree (or access to one nearby), you’re sitting on a treasure trove of opportunities to create delicious, homemade treats. Freshly picked apples are not just versatile—they’re also bursting with natural sweetness and nutrients. Whether you’re working with tart Granny Smiths, crisp Honeycrisps, or sweet Fujis, here are a few simple, mouthwatering recipes to turn your backyard bounty into something spectacular.
1. Homemade Apple Cider
Nothing says fall like the cozy aroma of homemade apple cider. Here’s how to make your own:
Ingredients:
- 8–10 medium-sized apples (any variety or a mix)
- 1 orange (optional, for added zest)
- 1 tablespoon cinnamon
- 1 teaspoon whole cloves
- 1 teaspoon nutmeg
- Water
- Sweetener (honey, sugar, or maple syrup) to taste
Instructions:
- Wash, core, and quarter the apples.
- Place apples, orange slices, and spices in a large pot.
- Add enough water to cover the fruit by about an inch.
- Simmer on low for 2–3 hours, stirring occasionally.
- Use a potato masher to crush the softened apples, then simmer for another hour.
- Strain the mixture through a cheesecloth or fine mesh sieve. Sweeten to taste and serve warm or chilled.
2. Classic Apple Butter
Apple butter is a rich, spiced spread that’s perfect on toast, pancakes, or even as a glaze for meats.
Ingredients:
- 5 pounds of apples, peeled, cored, and sliced
- 1 cup of sugar (adjust to taste)
- 1 tablespoon cinnamon
- 1 teaspoon allspice
- 1/2 teaspoon cloves
- 1/2 cup water or apple cider
Instructions:
- Combine apples and water in a slow cooker or heavy-bottomed pot.
- Cook on low for 8–10 hours, stirring occasionally, until apples break down into a thick, dark spread.
- Use an immersion blender to smooth the mixture (optional).
- Add sugar and spices, cooking for another hour until flavors deepen.
- Store in sterilized jars in the fridge or freezer.
3. Rustic Apple Galette
For a dessert that looks as good as it tastes, try this easy apple galette.
Ingredients:
- 1 store-bought or homemade pie crust
- 3–4 medium apples, thinly sliced
- 1/4 cup sugar
- 1 teaspoon cinnamon
- 1 tablespoon flour
- 1 egg (beaten, for brushing)
- Optional: caramel sauce or powdered sugar for topping
Instructions:
- Preheat your oven to 375°F (190°C).
- Roll out the pie crust on a parchment-lined baking sheet.
- Toss apple slices with sugar, cinnamon, and flour.
- Arrange apples in the center of the crust, leaving a 2-inch border.
- Fold the edges of the crust over the apples, overlapping slightly.
- Brush the crust with the beaten egg.
- Bake for 35–40 minutes or until golden brown. Drizzle with caramel sauce or dust with powdered sugar before serving.
4. Apple Chips
Looking for a healthy snack? Apple chips are quick, crunchy, and perfect for munching.
Ingredients:
- 2–3 apples
- 1 teaspoon cinnamon
- 1 teaspoon sugar (optional)
Instructions:
- Preheat your oven to 225°F (110°C).
- Slice apples thinly, removing seeds but keeping the skin.
- Arrange slices on a parchment-lined baking sheet.
- Sprinkle with cinnamon and sugar if desired.
- Bake for 1.5–2 hours, flipping halfway through, until crisp.
Final Tip: Preserve the Harvest
If you find yourself with more apples than you can use, consider freezing sliced apples for later recipes, making applesauce, or even trying your hand at canning. Having these goodies on hand makes homemade baking a breeze any time of year.
Your backyard apples are more than just fruit—they’re a canvas for culinary creativity. So grab a basket, head outside, and start turning those apples into homemade magic!